We used to donate our kitchen scraps to a local farm, then later to a botanical garden. At some point I decided I wanted to use them to make my OWN compost, but I wasn’t eager to invest in a pricey 2 bin system. Somewhere way back, I read that you could compost in a trash can. That intrigued me, so I improvised this system and did some additional tweaking along the way to make it even better.
My husband and I opted for an in-ground system since pests were a concern for us. In ground has worked well for us here in Miami, but there are some climates where this may not be as viable year round. We started with just one in-ground bin, but quickly discovered that an ideal system has at least 2 bins, one that is curing and one to which you’re actively adding material. That said, I will show you a tweak I added later that could work for those of you with space for only one.
Supplies for each bin:
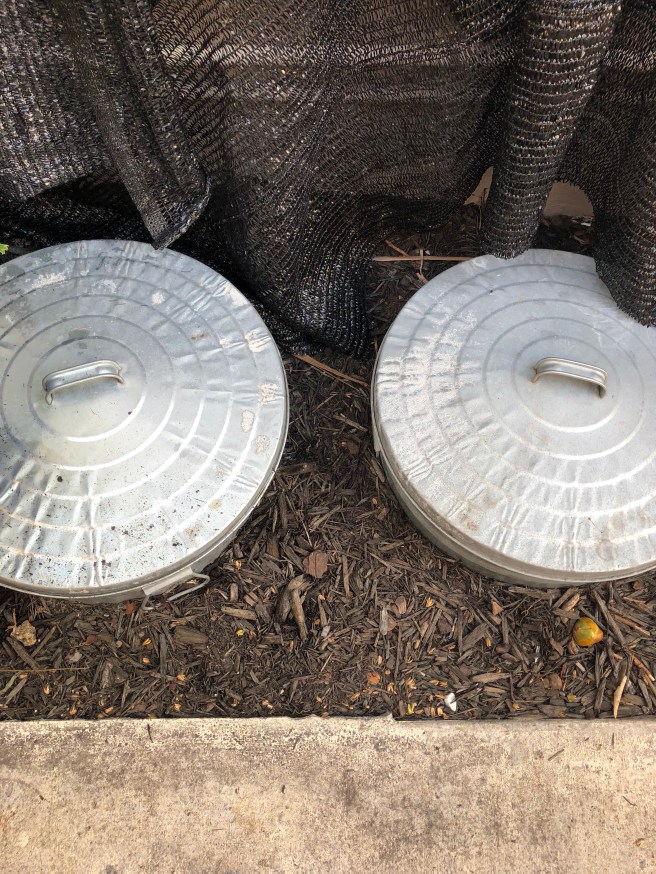
Behrens 31 gal Galvanized Steel Round Trash Can with Lid from Home Depot (or similar can from elsewhere)
Optional Tiered system using Behrens Steel Bushel Basket
Optional organic Coconut Coir as easy carbon rich BROWN material
Power drill or even an awl
Original system:
I had my husband drill holes in the bottom and about 1/2 of the way up the sides of the trash can for drainage. We did not place holes in the part of the can that would be above ground to avoid flies and other airborne pests from entering. I wish I could recall exactly what the spacing was…about every 6 to 8 inches and was NOT precise. My husband thinks he used a 3/8 drill bit but the holes just need to be large enough to allow drainage. Next he dug a hole deep enough so the bin was buried 3/4 of the way below the surface. |
This was our initial system and it worked well. We added our kitchen scraps and used leaves gathered from the neighborhood as our browns, along with some shredded paper. At some point my husband pointed out that I had NO IDEA what the neighbors might be spraying on their lawns! Ack! That is when I switched to organic coconut coir as our brown carbon rich material. I keep a bushel bin of it next to the compost bins so it is easy to cover food scraps every time we empty our kitchen collection bin. We are restaurant supply crazy over here, so we use this 4 quart graduated food container and it’s matching lid for collecting our food scraps. We used to keep this in the sink, but ants were a problem so now we keep it in the fridge. It is big enough to let us go a few days before emptying it.
Tweak 1:
The next tweak was adding worms to the bin. They are not necessary, but they really speed up the composting process and with worms you need less additional brown material. The worms were thriving and reproducing until they hit the sweltering Miami summer heat. I put shade cloth over my bins, but it was still too hot for them and my population dwindled over the summer months. They seem to be rebounding now in cooler fall weather. When you have worms, harvesting compost is trickier since you have to pick out or sift out the worms…not much fun. So, the NEXT tweak was engineered.
Tweak 2:
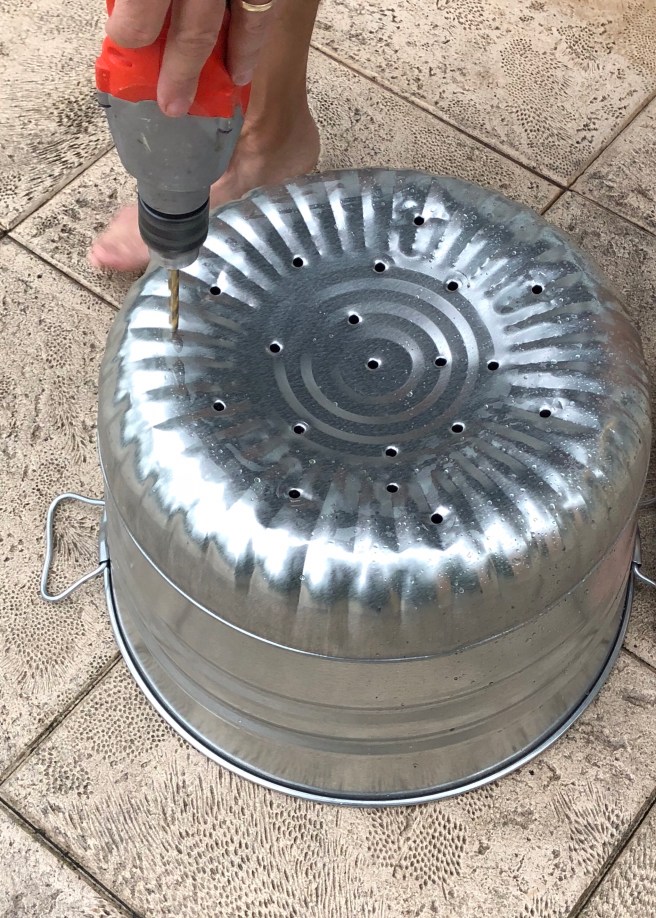
Some commercial worm bin systems have a multi-tiered structure. You fill a bottom tier completely, then start feeding on a higher tier so the worms migrate up to where food is being added. To create that additional layer, I bought a stainless bushel basket from Amazon and we drilled holes in the bottom and sides. Once the trash can was half full of composting material I put the bushel basket on top. Then I added a layer of the compost or coconut coir in the bottom of the bushel bin and started adding my food scraps in the bushel basket. Voila. The worms migrated up into the bushel basket. This allowed the lower layer to cure a bit and reduced the number of worms I needed to traumatize and relocate while harvesting. That was a WIN for me and the worms! This tweak could work with or without worms for those of you that have room for only one bin. Another note about the worms. I was hugely ghouled out about worms to begin with, but they are not nearly as icky as you may be imaging, and in fact you start to think of them fondly as your little workers who are turning trash into compost. Really!
Harvesting:
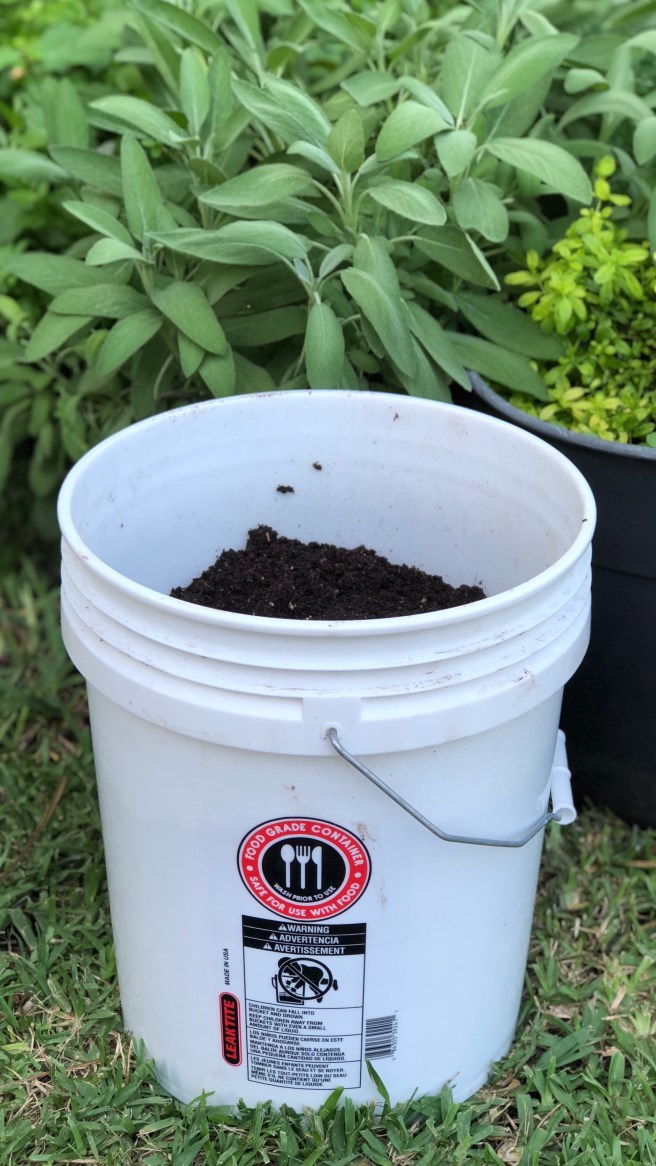
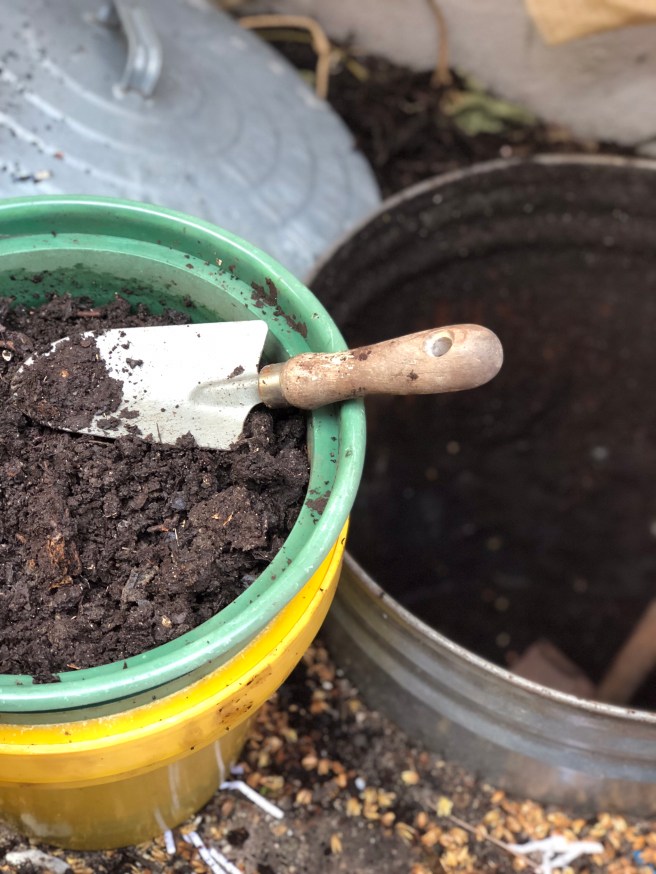
Once the bottom layer is done curing it is easy to lift out the bushel basket to harvest the finished compost from underneath. To harvest the compost I use this 1/4 inch sifting pan which fits right on top of a food grade bucket, available for about $4 at Home Depot. I dump a shovel full of compost at a time into the sifter and rock and shake the bucket until all that remains are the larger clumps. Those larger bits of remaining organic matter and any straggler worms get dumped back into the main bin and become the “new” bottom tier for some additional curing. Once I have emptied the bin, I leave the bushel basket out until the bin is half full again. I can use the food grade bucket to carry my harvested compost right to the garden for spreading. I also like this lid seat so I can use my bucket as seating while I’m lanting or pulling weeds…bonus!
Tweak 3:
My very latest (today) tweak is adding some rope to the handles of the bushel basket to make it easier to hoist out of the can since the fit is fairly snug. Will see how that works.
Amendments:
I have played around with several compost amendments.
1. If you have worms they need grit added periodically. I use oyster shell powder by Down to Earth.
2. Coffee Grounds are a great source of nitrogen. You can ask your local coffee shop to save them for you. (Green)
3. Alfalfa meal is a great activator of compost due to it’s beneficial nitrogen to carbon ratio. (Green)
4. Seaweed is another nice nitrogen source if you have access to it. (Green)
5. I had been told that horse bedding was a great addition to compost so I found a farm and carted some home. But I just listened to an excellent composting podcast by Joe the Gardener that warned that horse manure can be a source of persistent herbicides that can damage the garden, so take caution there. I did inquire about whether the horses received antibiotics, which they did not, but that is another question worth asking.
There are lots of great lists out there for what to compost. The above linked podcast has a nice one. Here is another I received from my local farmer as part of a soil and composting workshop.

Thank you for the valuable info. I am a friend of Adriana your architect. Had no choice but to start buying vegan because food is making me sick. I will give me all to start my veggies. Thank you so much Ana
LikeLike